 Dad and Grandpa ran the rototiller to prepare the soil for planting.
 We had to find the proper tools to help us make out jobs easier. Not to sure how the toque helped us, but the gloves protected our hands so we didn't get blisters from the hoe.
 We made rows to help keep the different planst organized for when we need to weed, and to give the palnts right spacing they need to grow properly.
 M spacing the seed very carefully.
 B gently covering the seeds.
  Cutting up the seed potatoes.
 Garden is all planted ready for watering.
Wednesday, May 18, 2011
Planting a Garden
For our unit on learning about plant needs and life cycles we decided to plant a garden in the back yard. M and B got to plan how they were going to plant the garden, and buy the seed they would need to plant. They had to find out how to plant each of the different seeds and what they need to grow.
Saturday, May 7, 2011
MOTHER'S DAY
For Mother's Day the kids wanted to make something special. We decided that we would make a Brag Board. A Brag Board is a place to hang up special pictures or drawing that your kids or grand kids have made.
 After your board and close pins are painted and dried you are ready to put the letters on the board.
We penciled our letters on the board first and then traced over them in paint.
 We placed the close pins on the board alternating the openings on the top and bottom edges. Then one by one we put a little dab of wood glue on the bottom and spread it out with a Q-tip so it was even and not to thick, and placed it in its spot back on the board. Remember to follow in sturctions on you wood glue bottle. We didn't use clamps but it for a stronger hold it would plrobably best.

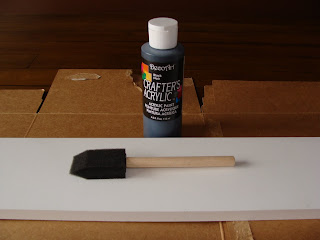
To make this project you will need: a board about 3 feet long and 2-3 inches wide, or how ever big you would like it to be. Paint(any color you like)- we used craft paint form the dollar store. We used many colors but you can make it any color you like.Paint brushes we used a sponge brush to paint the board and smaller brushes for the close pins and letter.Close pins. We used 13 on our board. Wood glue and a pencil.

Place the board on some paper or cardboard, so you don't get paint on any other surface. Cover the board with a coat of paint and let it dry. Repeat 2-3 times so you completely cover the board.
 You may want to turn your board on its side to paint the edge, or leave it flat.
 While you are letting the board dry you can paint you close pins. They may need 2 coats of paint as well. Remember to paint the inside of the close pins. Before they are completely dry you will need to open them up and make sure they are not painted shut.
After your board and close pins are painted and dried you are ready to put the letters on the board.
We penciled our letters on the board first and then traced over them in paint.
 We placed the close pins on the board alternating the openings on the top and bottom edges. Then one by one we put a little dab of wood glue on the bottom and spread it out with a Q-tip so it was even and not to thick, and placed it in its spot back on the board. Remember to follow in sturctions on you wood glue bottle. We didn't use clamps but it for a stronger hold it would plrobably best.

Subscribe to:
Comments (Atom)